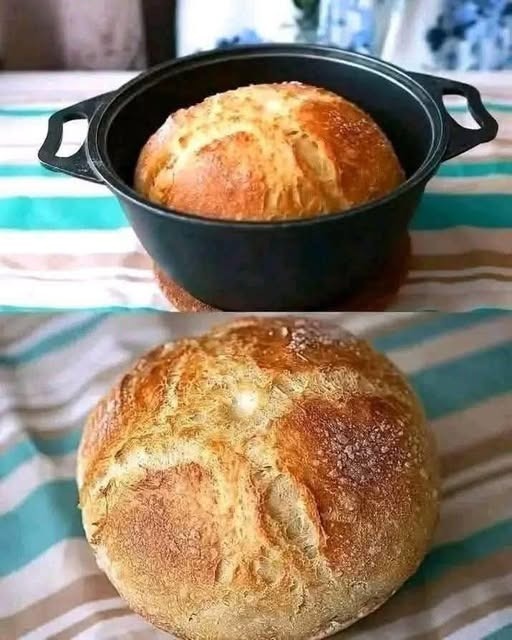
There is something wonderfully comforting about a loaf of homemade bread with a crisp, golden crust and a soft, airy center. This rustic Dutch oven bread is simple enough for beginners and produces bakery-style results without complicated equipment or difficult techniques. The Dutch oven traps steam while the bread bakes, helping create the beautifully browned, crackly crust shown in the picture.
This recipe uses a simple no-knead method. The dough needs time to rest and develop flavor, but very little hands-on work. Mix the ingredients, let the dough rise, shape it, and bake it in a preheated Dutch oven. The result is a round, rustic loaf that is delicious sliced warm with butter, served alongside soup, or used for sandwiches.
Ingredients
- 3 cups (375 g) all-purpose or bread flour
- 1 ½ teaspoons salt
- 1 teaspoon instant or active dry yeast
- 1 ½ cups (360 ml) warm water
- 1 teaspoon honey or sugar, optional
- 1 tablespoon olive oil, optional
- Extra flour or cornmeal for shaping
Step 1: Prepare the Dough
In a large mixing bowl, combine the flour, salt, and yeast. If using honey or sugar, stir it into the warm water until dissolved. Make sure the water is warm rather than hot, as very hot water can interfere with the yeast.
Pour the water into the flour mixture. Add the olive oil if desired. Using a wooden spoon or sturdy spatula, mix everything together until no large patches of dry flour remain.
The dough will look sticky and rough. That is exactly what you want. There is no need to knead it like traditional bread dough.
Step 2: Let the Dough Rise
Cover the bowl tightly with plastic wrap, a lid, or a clean kitchen towel. Leave it at room temperature for about 8 to 12 hours.
Overnight rising works particularly well. During this resting period, the yeast slowly develops the dough’s structure and flavor. When ready, the dough should look noticeably larger, bubbly, and somewhat puffy.
If your kitchen is cool, the dough may need a little extra time. Avoid judging the dough only by the clock; its appearance is a better guide.
Step 3: Shape the Loaf
Lightly flour your work surface. Gently scrape the dough from the bowl onto the floured surface.
Sprinkle a little flour over the dough and carefully fold the edges toward the center several times. Turn the dough over and gently shape it into a round loaf.
Try not to press all the air out. Those air pockets help create a lighter, more rustic crumb.
Place the shaped dough on a sheet of parchment paper and let it rest for approximately 30 to 45 minutes while the oven heats.
Step 4: Preheat the Dutch Oven
Place a Dutch oven with its lid inside the oven. Preheat the oven to 450°F (230°C) for about 30 minutes.
Preheating the Dutch oven is important because the hot cooking vessel immediately begins baking the outside of the dough. The enclosed environment also traps steam, which helps produce the distinctive crisp crust.
Be extremely careful when handling the Dutch oven, as both the pot and lid will become extremely hot.
Step 5: Add the Dough
Using the parchment paper as a sling, carefully lower the dough into the hot Dutch oven.
For an attractive rustic appearance, lightly dust the top with flour. You can also make one or two shallow cuts across the surface using a sharp knife or bread lame. These cuts give the expanding loaf a controlled place to open during baking.
Cover the Dutch oven with its hot lid.
Step 6: Bake the Bread
Bake covered for 30 minutes. Keeping the lid on during this stage allows steam to remain trapped around the loaf.
After 30 minutes, carefully remove the lid. Continue baking for another 10 to 20 minutes, or until the bread is deeply golden brown.
For an especially crisp crust, you can bake for a few additional minutes, watching carefully so the loaf does not become too dark.
The finished bread should sound hollow when gently tapped on the bottom.
Step 7: Cool Before Slicing
Remove the loaf from the Dutch oven and transfer it to a wire rack. Allow it to cool for at least 45 minutes before slicing.
Although it may be tempting to cut into the bread immediately, allowing it to cool gives the interior time to finish setting. Cutting too early can make the center seem gummy.
Once cooled, slice it with a serrated bread knife and enjoy.
Helpful Tips for Perfect Bread
Use the right water temperature: Lukewarm water is ideal for activating yeast. Extremely hot water can damage the yeast.
Don’t add too much flour: Sticky dough is normal for this recipe. Adding excessive flour can make the finished loaf dense.
Give it enough rising time: Slow fermentation creates better flavor and texture. If your kitchen is cool, allow additional rising time.
Preheat the pot: A thoroughly heated Dutch oven helps produce a crisp, golden crust.
Don’t skip the cooling period: The bread continues to develop its final texture as it cools.
Serving Ideas
This rustic loaf is delicious in countless ways. Serve thick slices with butter and jam for breakfast, or pair it with soups, stews, chili, or pasta for dinner. It also makes excellent toast and sandwiches.
For a simple appetizer, toast slices and drizzle them with olive oil, then top with tomatoes, garlic, herbs, or soft cheese.
Storage
Store completely cooled bread at room temperature in a paper bag or bread box for up to 2 days. Avoid storing fresh bread in the refrigerator because it can cause the crumb to become stale more quickly.
For longer storage, slice the loaf and freeze it in an airtight freezer-safe bag. Individual slices can be thawed and toasted whenever you want fresh-tasting homemade bread.
This easy Dutch oven bread is a wonderful recipe to keep on hand. With just a few basic ingredients and a little patience, you can create a gorgeous golden loaf with a crunchy crust and tender, flavorful center—perfect for sharing straight from your kitchen.