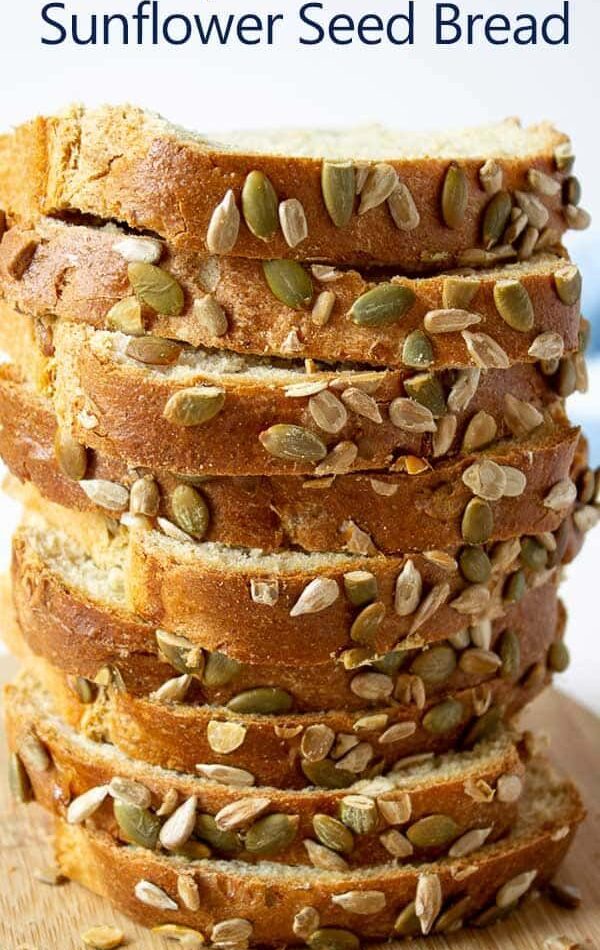
This hearty homemade Pumpkin and Sunflower Seed Bread makes two wholesome, beautifully textured loaves. Made with white whole-wheat flour, all-purpose flour, honey, and a generous amount of crunchy seeds, it has a tender crumb, lightly crisp crust, and wonderful nutty flavor. It is delicious fresh from the oven, toasted with butter and honey, or sliced for sandwiches. The recipe is based on the ingredient quantities and method published by Beyond the Chicken Coop. (Beyond the Chicken Coop)
Ingredients
For the Dough
- 2 cups warm water, about 105–110°F
- 4½ teaspoons active dry yeast
- ¼ cup all-purpose flour, for proofing
- ¼ cup vegetable oil
- ¼ cup honey
- 1 teaspoon salt
- 1¾ cups additional all-purpose flour
- 2½–3 cups white whole-wheat flour
- ½ cup raw, unsalted pumpkin seeds
- ¼ cup raw, unsalted sunflower seeds
For the Topping
- 1 egg white
- 1 tablespoon water
- 2 tablespoons pumpkin seeds
- 2 tablespoons sunflower seeds
Preparing the Dough
Begin by measuring the warm water into the bowl of a stand mixer. The water should be comfortably warm rather than hot; around 105–110°F is ideal for activating the yeast without damaging it.
Add the active dry yeast and ¼ cup of all-purpose flour. Stir gently to combine, then let the mixture stand for 5–10 minutes. When the yeast is active, the surface should become slightly foamy or bubbly. Proofing the yeast is an important step because it confirms that the yeast is still active before you add the remaining ingredients. (Beyond the Chicken Coop)
Once the yeast mixture is bubbly, add the vegetable oil, honey, salt, and the remaining all-purpose flour. Mix until the ingredients are well combined.
Next, add the pumpkin seeds and sunflower seeds. Mix briefly so the seeds become evenly distributed throughout the developing dough.
Begin adding the white whole-wheat flour, starting with about 2 cups. Continue mixing while adding the remaining flour gradually, approximately ¼ cup at a time. You may not need the entire amount. The finished dough should come together into a soft ball and should no longer be excessively sticky. Because flour absorbs moisture differently depending on humidity, measuring technique, and other conditions, adding flour gradually gives you better control over the dough consistency. (Beyond the Chicken Coop)
Kneading and First Rise
Knead the dough using the dough hook attachment of your stand mixer for approximately 5–8 minutes. The dough should become smoother and more elastic as it is kneaded.
Lightly grease a large bowl and transfer the dough into it. Turn the dough once so its surface receives a thin coating of oil. Cover the bowl with plastic wrap or a clean kitchen towel.
Place the bowl somewhere warm and draft-free and let the dough rise until approximately doubled in size. Depending on the temperature of your kitchen and the activity of the yeast, this may take about 1 hour, although the original recipe allows roughly 1½ hours for total rising time. (Beyond the Chicken Coop)
Avoid relying only on the clock. The dough’s appearance is the better guide. Once it has noticeably expanded and looks airy and puffy, it is ready for shaping.
Shaping the Loaves
Remove the cover and gently press down on the dough to deflate it. You do not need to knead aggressively at this stage.
Divide the dough into two equal portions. Shape each portion into a ball first, then flatten it gently into a rectangle.
Starting from one short side, roll the dough up tightly, similar to forming a jelly-roll. Pinch the seam closed, then tuck the ends inward and pinch them together. This creates a compact loaf with a smooth surface.
Grease two standard loaf pans and place one shaped loaf into each pan, seam-side down. Cover the pans and allow the loaves to rise again for approximately 30 minutes. They should become visibly puffy during this second rise. (Beyond the Chicken Coop)
Adding the Seed Topping
While the loaves are completing their second rise, prepare the egg wash. Whisk the egg white together with 1 tablespoon of water until lightly combined.
Once the loaves have risen, gently brush the tops with the egg wash. Sprinkle the remaining pumpkin seeds and sunflower seeds evenly over the surface. The egg wash helps the seeds adhere while also giving the finished bread an attractive golden-brown appearance.
Baking
Preheat your oven to 350°F before the bread goes in. A fully preheated oven is important for consistent baking and proper oven spring.
Place both loaf pans in the oven and bake for approximately 45 minutes, or until the loaves are deeply golden and sound hollow when lightly tapped. The original recipe specifies a 350°F oven and approximately 45 minutes of baking time. (Beyond the Chicken Coop)
If your two pans bake differently because of their position in the oven, rotate them carefully about halfway through baking. Be cautious when opening the oven so you do not unnecessarily lose heat.
When finished, remove the pans from the oven and let the bread cool in the pans for about 10 minutes. Then carefully turn the loaves out onto a wire rack. Allow them to cool completely before slicing.
Helpful Bread-Baking Tips
Use raw, unsalted pumpkin and sunflower seeds for the dough and topping. Salted or heavily roasted seeds can change the flavor and texture of the bread. (Beyond the Chicken Coop)
The amount of whole-wheat flour can vary. Start with the lower amount and gradually add more until the dough reaches the correct consistency rather than adding all the flour automatically.
Keep in mind that yeast activity and rising time are affected by room temperature. A cool kitchen may require additional time, while a warm kitchen can make the dough rise faster.
Always allow the bread to cool fully before cutting. Slicing yeast bread while it is still very hot can compress the soft interior and make the slices appear gummy.
How to Serve
This bread is wonderfully versatile. For breakfast, toast a thick slice and spread it with butter, then drizzle it with honey for a simple sweet combination. It also works beautifully with jam, nut butter, or cream cheese.
For lunch, use thin slices to make sandwiches with turkey, chicken, cheese, vegetables, or your favorite sandwich fillings. Its hearty whole-wheat character also makes it an excellent accompaniment to soups and stews.
For an easy snack, toast leftover slices and top them with avocado, hummus, or cottage cheese.
Storage
Once completely cool, store the bread in an airtight container or tightly wrapped at room temperature for several days. For longer storage, slice the loaves and freeze them in a well-sealed freezer bag. Individual slices can then be removed as needed and toasted directly from frozen.
With its hearty whole-wheat base, chewy texture, and crunchy pumpkin and sunflower seeds, this homemade bread is a satisfying addition to breakfast, lunch, or dinner. The combination of honey and seeds gives each slice just enough sweetness and nuttiness without overpowering its wholesome character.