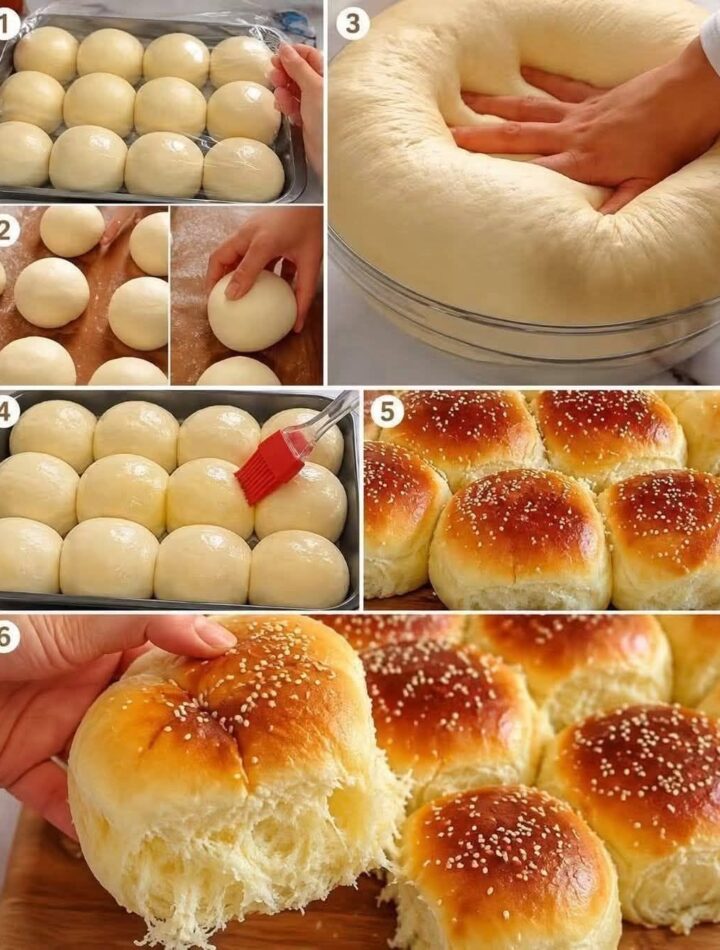
Milk Brioche is one of those homemade breads that feels almost too soft to be real. Light, buttery, slightly sweet, and wonderfully tender, each slice has a delicate crumb that practically melts in your mouth. The secret is a rich dough made with milk, eggs, butter, and a little sugar, followed by proper kneading and enough rising time.
This brioche is perfect for breakfast, afternoon tea, sandwiches, French toast, or simply enjoying warm with butter and jam. Once you make it at home, you may never look at ordinary bread the same way again.
Ingredients
3 ½ cups all-purpose or bread flour
2 ¼ teaspoons instant yeast
¼ cup granulated sugar
1 teaspoon salt
¾ cup warm whole milk
2 large eggs
1 teaspoon vanilla extract, optional
6 tablespoons unsalted butter, softened
1 tablespoon honey, optional
1 egg yolk
1 tablespoon milk, for brushing
Why This Brioche Is So Soft
The combination of milk, eggs, and butter gives this bread its luxurious texture. Milk adds moisture and tenderness, while eggs contribute richness and structure. Butter creates that classic brioche softness and pleasant flavor.
The dough will be softer and stickier than ordinary bread dough. This is completely normal. Resist the temptation to add too much flour, because excessive flour can make the finished loaf heavy instead of fluffy.
Proper kneading is also important. As the dough develops gluten, it becomes smoother, stretchy, and elastic. This allows the bread to rise beautifully while keeping its cloud-like interior.
Step 1: Prepare the Dough
Pour the warm milk into a large mixing bowl. The milk should feel warm rather than hot. Add the instant yeast and sugar, then stir gently.
Add the eggs, vanilla extract if using, and honey. Mix until combined.
Gradually add the flour and salt. Stir with a wooden spoon or dough hook until a sticky, rough dough forms.
At this stage, don’t worry if the dough looks messy. Brioche dough becomes smooth with kneading.
Step 2: Knead Until Smooth
Using a stand mixer fitted with a dough hook, knead the dough on low to medium speed for about 7–10 minutes.
If kneading by hand, transfer the dough to a lightly floured surface and knead patiently. The dough will initially stick to your hands, but it should become smoother as you work.
Add the softened butter gradually, one tablespoon at a time. Allow each addition to become incorporated before adding the next.
Continue kneading until the dough is soft, elastic, glossy, and stretchy. When you gently pull a small piece of dough, it should stretch thinly without immediately tearing.
Avoid adding large amounts of flour. A slightly sticky dough is what helps create the wonderfully soft texture.
Step 3: First Rise
Place the dough in a lightly greased bowl and cover it with plastic wrap or a clean kitchen towel.
Let it rise in a warm, draft-free place for approximately 1–2 hours, or until it has noticeably increased in size.
For even more flavor, you can refrigerate the dough overnight after the first rise. Chilled brioche dough is also easier to shape.
Step 4: Shape the Brioche
Once the dough has risen, gently press it down to release excess air.
Divide the dough into three equal portions for a braided loaf, or divide it into several small pieces for individual brioche rolls.
For a loaf, roll each portion into a smooth rope. Place the three ropes together and braid them gently, without pulling the dough too tightly.
Transfer the shaped brioche to a greased loaf pan lined with parchment paper if desired.
Cover loosely and allow it to rise again for about 45–75 minutes. The dough should become noticeably puffy.
Step 5: Brush and Bake
Preheat your oven to 350°F (175°C).
Whisk together the egg yolk and one tablespoon of milk. Gently brush the mixture over the surface of the risen brioche. This creates a beautiful golden, glossy crust.
Bake for approximately 25–35 minutes, depending on the size and shape of your loaf. The top should be deeply golden, and the bread should sound lightly hollow when tapped.
If the top becomes brown too quickly, loosely cover it with aluminum foil during the final part of baking.
Step 6: Cool Properly
Remove the brioche from the oven and let it rest in the pan for about 10 minutes.
Carefully transfer it to a wire rack and allow it to cool before slicing. Although the aroma may make it tempting to cut immediately, allowing the bread to cool helps the crumb finish setting.
Once cool, slice it with a serrated bread knife.
Tips for the Fluffiest Milk Brioche
Use softened butter: Cold butter can be difficult to incorporate and may prevent the dough from becoming smooth.
Don’t overload the dough with flour: Sticky dough is normal for brioche. Too much flour produces a dense loaf.
Give it enough rising time: Yeast needs time to create the airy structure that makes brioche fluffy.
Knead thoroughly: Proper gluten development gives the dough strength and elasticity.
Use warm, not hot, milk: Excessively hot milk can damage the yeast.
Don’t overbake: Brioche should be golden outside and tender inside. Overbaking can dry it out.
Serving Ideas
Fresh Milk Brioche is delicious while still slightly warm. Serve thick slices with butter, honey, strawberry jam, chocolate spread, or your favorite fruit preserves.
It also makes an excellent base for French toast. Slightly stale brioche absorbs the egg mixture beautifully while remaining soft in the center.
For breakfast sandwiches, toast slices lightly and fill them with eggs, cheese, vegetables, or other favorite fillings. You can also turn leftover brioche into bread pudding for a rich and comforting dessert.
Storage
Keep cooled brioche in an airtight container or tightly wrapped at room temperature for up to three days. For longer storage, wrap the loaf well and freeze it for up to two months.
To serve frozen brioche, thaw it at room temperature and warm it gently in the oven. This helps restore some of its fresh-baked softness.