Few desserts are as comforting and irresistible as a bowl of homemade chocolate pudding. This Heavenly Chocolate Pudding is wonderfully creamy, deeply chocolatey, and silky smooth from the first spoonful to the last. Made with simple pantry ingredients, it is an old-fashioned dessert that feels special enough for guests but easy enough for a weeknight treat.
Unlike many instant pudding mixes, homemade chocolate pudding has a rich flavor and luxurious texture that comes from gently cooking cocoa, chocolate, milk, and a few other basic ingredients together. A little vanilla at the end enhances the chocolate flavor, while optional whipped cream and chocolate shavings make every serving look beautiful.
Whether served warm for a cozy dessert or chilled for a refreshing sweet treat, this pudding is sure to become a family favorite.
Ingredients
For the Chocolate Pudding
- 1/2 cup granulated sugar
- 1/4 cup unsweetened cocoa powder
- 3 tablespoons cornstarch
- 1/4 teaspoon salt
- 2 1/2 cups whole milk
- 1/2 cup heavy cream
- 4 ounces semi-sweet or dark chocolate, finely chopped
- 2 tablespoons unsalted butter
- 1 teaspoon pure vanilla extract
For the Topping
- Whipped cream, as desired
- Chocolate shavings or grated chocolate
- Fresh strawberries or raspberries, optional
- A light dusting of cocoa powder, optional
Equipment
You will need a medium saucepan, a whisk, a heatproof spatula or spoon, measuring cups and spoons, and several small serving bowls or dessert glasses.
Step 1: Prepare the Dry Ingredients
Begin by combining the granulated sugar, cocoa powder, cornstarch, and salt in a medium saucepan. Whisk everything together until the mixture is evenly blended.
This step is important because it distributes the cornstarch throughout the sugar and cocoa. When the liquid is added, the cornstarch will thicken the pudding more evenly and is less likely to form lumps.
For the best chocolate flavor, choose a good-quality unsweetened cocoa powder. You can use either natural cocoa powder or Dutch-process cocoa, although Dutch-process cocoa will generally give the pudding a darker color and smoother chocolate flavor.
Step 2: Add the Milk and Cream
Slowly pour the whole milk into the dry mixture while whisking constantly. Continue whisking until the cocoa and cornstarch are completely incorporated.
Add the heavy cream and whisk again.
The mixture should look smooth and fairly thin at this stage. Don’t worry if it does not resemble pudding yet. The thick, creamy texture develops as it heats.
Using whole milk gives the pudding a rich, creamy consistency. The heavy cream adds extra silkiness and makes the finished dessert feel especially indulgent.
Step 3: Cook the Pudding
Place the saucepan over medium heat. Cook the mixture while whisking frequently, paying special attention to the bottom and corners of the pan.
As the mixture warms, the cornstarch will begin to activate. After several minutes, the pudding will gradually become thicker.
Continue cooking until the mixture reaches a gentle simmer and becomes noticeably thick. This usually takes approximately 6 to 10 minutes, depending on your stove and saucepan.
Do not walk away from the pan during this stage. Milk-based mixtures can scorch quickly, and constant or frequent whisking helps prevent sticking and lumps.
Once the pudding is thick enough to coat the back of a spoon, reduce the heat to low.
Step 4: Add the Chocolate
Add the finely chopped chocolate to the hot pudding. Stir gently until the chocolate has completely melted and the mixture becomes smooth and glossy.
The chopped chocolate provides additional richness and gives the pudding a deeper, more luxurious chocolate flavor.
If you prefer a slightly sweeter pudding, use semi-sweet chocolate. For a more intense chocolate dessert, dark chocolate works beautifully.
Once the chocolate has melted, remove the saucepan from the heat.
Step 5: Add Butter and Vanilla
Immediately stir in the unsalted butter and vanilla extract.
The butter melts into the warm pudding, adding richness and helping create an exceptionally smooth texture. Vanilla may seem like a small addition, but it helps round out the chocolate flavor and makes the dessert taste more balanced.
Stir for another minute or two until everything is completely incorporated.
At this point, the pudding should be thick, glossy, and beautifully fragrant.
Step 6: Strain for an Extra-Smooth Texture
For an exceptionally silky pudding, pour the mixture through a fine-mesh sieve into a clean bowl.
This step is optional, but it can remove any tiny bits of cooked eggless starch or cocoa lumps that may have developed during cooking.
If your pudding is already perfectly smooth, you can skip this step.
Step 7: Portion the Pudding
Spoon or pour the warm pudding into individual dessert glasses, ramekins, or small serving bowls.
For an elegant presentation, use clear glasses so everyone can see the beautiful chocolate layers.
If you prefer to serve the pudding warm, allow it to cool for about 5 to 10 minutes before adding your toppings.
For chilled pudding, cover each serving with plastic wrap, pressing it gently against the surface of the pudding. This prevents a skin from forming as it cools.
Place the pudding in the refrigerator and chill for at least 2 hours.
Step 8: Add the Toppings
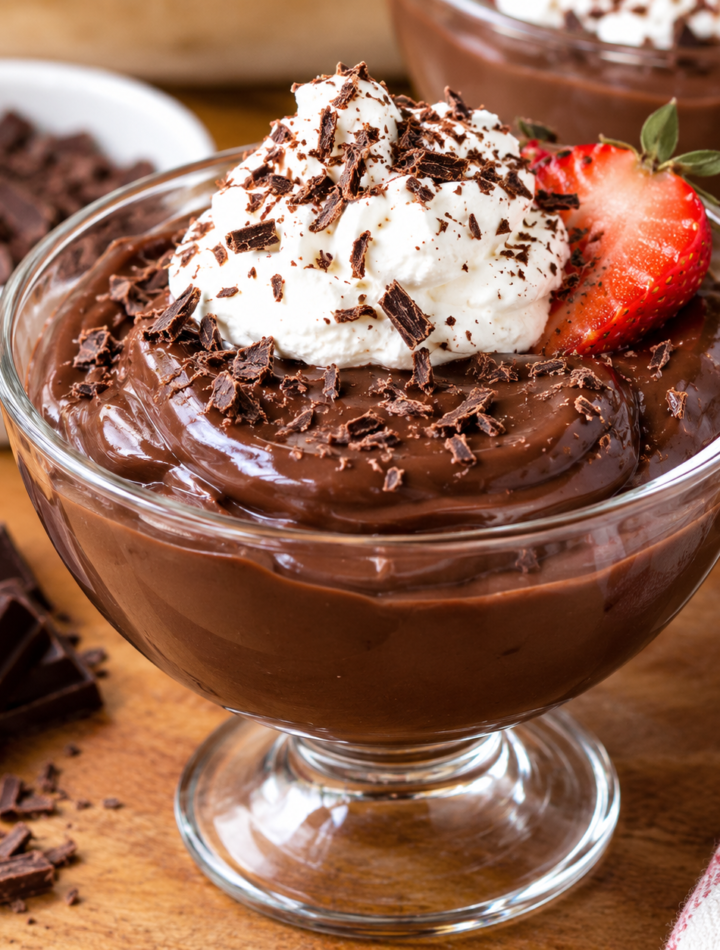
Just before serving, top each pudding with a generous spoonful of whipped cream.
Finish with chocolate shavings, grated chocolate, or a light sprinkle of cocoa powder. A fresh strawberry or a few raspberries add a beautiful pop of color and a pleasant fruity contrast to the rich chocolate.
For an especially decadent dessert, you can add crushed chocolate cookies, toasted nuts, caramel sauce, or a small drizzle of melted chocolate.
Keep the toppings simple if you want the chocolate pudding itself to remain the star.
Tips for Perfect Chocolate Pudding
Use Quality Chocolate
Because chocolate is the main flavor, using good-quality chocolate makes a noticeable difference. Semi-sweet or dark chocolate with a smooth flavor works particularly well.
Whisk Continuously
Whisking prevents the cornstarch from settling and helps create a smooth pudding. It also reduces the risk of scorching the milk on the bottom of the saucepan.
Don’t Overcook
Once the pudding becomes thick and reaches a gentle simmer, it does not need prolonged cooking. Overcooking can make the texture heavier than necessary.
Chop the Chocolate Finely
Finely chopped chocolate melts much more quickly and evenly. Large pieces may take longer to melt and can leave small pieces in the finished pudding.
Cover the Surface
If you don’t like a skin forming on chilled pudding, press plastic wrap directly against the surface before refrigerating.
Serving Suggestions
Heavenly Chocolate Pudding can be served in many different ways. For a classic presentation, simply add whipped cream and chocolate shavings.
For a layered dessert, alternate pudding with crushed chocolate cookies and whipped cream in a glass. You can also add sliced bananas or strawberries between the layers.
For a holiday dessert, serve the pudding in elegant glasses with whipped cream, shaved chocolate, and fresh berries.
You can even use this pudding as a filling for homemade chocolate tart shells, cream puffs, or dessert parfaits.
Storage
Store leftover pudding covered in the refrigerator for up to 3 days. Keep it chilled until ready to serve.
The pudding may become slightly firmer after refrigeration. If you prefer a softer texture, let it sit at room temperature for a few minutes before serving and gently stir it.
For the best flavor and texture, add whipped cream and fresh fruit immediately before serving rather than storing the toppings with the pudding.
Variations
Mint Chocolate Pudding
Add a small amount of peppermint extract along with the vanilla for a refreshing mint-chocolate version. Start with a very small quantity because peppermint extract can be quite strong.
Mocha Chocolate Pudding
Add 1 to 2 teaspoons of instant espresso powder to the dry ingredients. Coffee enhances the natural richness of chocolate without necessarily making the pudding taste strongly of coffee.
Orange Chocolate Pudding
Add a little finely grated orange zest to the finished pudding. The bright citrus flavor pairs wonderfully with dark chocolate.
Peanut Butter Chocolate Pudding
Swirl a spoonful of creamy peanut butter into each serving before chilling. You can also sprinkle chopped peanuts over the whipped cream.
Coconut Chocolate Pudding
Replace part of the milk with unsweetened coconut milk and finish the pudding with toasted coconut flakes.
Frequently Asked Questions
Can I make this pudding ahead of time?
Yes. Chocolate pudding is an excellent make-ahead dessert. Prepare it several hours before serving and keep it refrigerated. Add whipped cream and other toppings just before serving.
Can I use milk chocolate?
You can, but the pudding will be sweeter and milder. If using milk chocolate, consider slightly reducing the sugar depending on your preference.
Why did my pudding become lumpy?
Lumps usually develop when the cornstarch is not thoroughly mixed into the cold liquid before heating or when the mixture is not whisked frequently enough while cooking. If lumps appear, strain the hot pudding through a fine-mesh sieve.
Can I serve it warm?
Absolutely. Warm chocolate pudding is wonderfully comforting and has a soft, creamy consistency. Allow it to cool slightly before serving so it isn’t too hot.