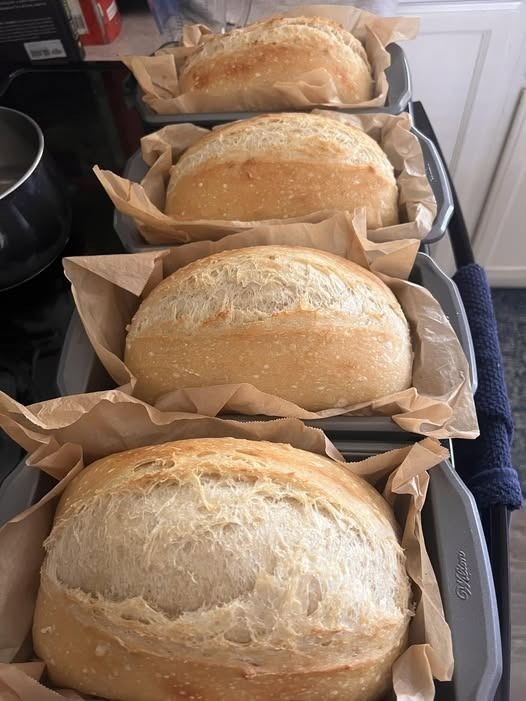
Finding a gluten-free bread that is genuinely soft, fluffy, and satisfying can be challenging. Many homemade gluten-free loaves turn out dense, dry, crumbly, or overly heavy. This Fluffy & Soft Gluten-Free Bread recipe is different. It produces a tender loaf with a lightly golden crust and a soft, airy center that works beautifully for sandwiches, toast, breakfast, or simple snacks.
The secret is using the right gluten-free flour blend, enough moisture, and a few ingredients that help replace the structure normally provided by gluten. Because gluten-free dough behaves differently from traditional wheat dough, the mixture will look more like a thick, sticky batter than a kneadable bread dough. That is completely normal.
Ingredients
- 3 cups gluten-free all-purpose flour blend
- 2 tablespoons granulated sugar or honey
- 2 ¼ teaspoons active dry yeast
- 1 teaspoon salt
- 1 teaspoon xanthan gum, if your flour blend does not already contain it
- 1 ¼ cups warm milk or unsweetened dairy-free milk
- 2 large eggs, room temperature
- 3 tablespoons melted butter or neutral oil
- 1 teaspoon apple cider vinegar
- 1 teaspoon gluten-free baking powder
- ½ teaspoon garlic powder, optional for a savory loaf
For brushing:
- 1 tablespoon melted butter or olive oil
Preparing the Yeast
Start by warming the milk. It should feel comfortably warm rather than hot. Very hot liquid can kill the yeast, while cool liquid may slow activation.
Pour the warm milk into a small bowl and stir in the sugar and yeast. Let the mixture stand for about 5–10 minutes. If the yeast is active, a light layer of foam should appear on the surface.
If using instant yeast, you can mix it directly with the dry ingredients, but activating it first is a helpful way to make sure the yeast is working properly.
Mixing the Dry Ingredients
In a large mixing bowl, combine the gluten-free flour, salt, xanthan gum, and baking powder.
Xanthan gum is particularly important if your gluten-free flour blend does not contain it. It helps bind the ingredients and gives the bread a more flexible texture. Without enough binding, gluten-free bread can become fragile and crumble easily.
Whisk the dry ingredients thoroughly so everything is evenly distributed.
Combining the Wet Ingredients
In another bowl, whisk together the eggs, melted butter or oil, and apple cider vinegar.
Add the activated yeast mixture and stir gently.
Pour the wet ingredients into the bowl containing the dry ingredients. Using a sturdy wooden spoon, spatula, or electric mixer with a paddle attachment, mix until everything is well combined.
The mixture should be thick, smooth, and sticky. Do not add large amounts of extra flour simply because the dough does not resemble conventional bread dough.
Unlike wheat bread, gluten-free dough does not need to be kneaded to develop gluten. In fact, trying to knead it like traditional dough can make the process unnecessarily difficult.
Preparing the Loaf
Grease a standard 9 x 5-inch loaf pan with butter or oil. You can also line it with parchment paper, leaving a little overhang to make removing the finished bread easier.
Transfer the dough into the prepared pan.
Use a wet spatula to smooth the surface. Gluten-free dough can be sticky, so lightly dampening the spatula makes shaping much easier.
Try to spread the mixture evenly from corner to corner. A smooth top will help create a nicely shaped loaf as it rises.
Letting the Bread Rise
Cover the loaf loosely with plastic wrap or a clean kitchen towel.
Place it somewhere warm and draft-free for approximately 30–60 minutes. The exact time depends on the temperature of your kitchen and the activity of your yeast.
The bread does not necessarily need to double in size. Look for a noticeable increase in volume and a slightly rounded top.
Avoid letting gluten-free dough rise for too long. Over-proofing can cause the loaf to collapse during baking and may produce a dense center.
Baking
Preheat your oven to 375°F (190°C).
Once the dough has risen, gently place the pan in the center of the oven.
Bake for approximately 35–45 minutes, or until the top is golden brown and the loaf feels firm.
If the top begins browning too quickly, loosely cover it with aluminum foil during the final portion of baking.
For the most reliable result, the internal temperature should be around 200–205°F (93–96°C) when measured in the center with an instant-read thermometer.
Remove the bread from the oven and immediately brush the top with melted butter or olive oil. This helps keep the crust pleasantly tender.
Cooling the Bread
Allow the bread to cool in the pan for about 10 minutes.
Then carefully transfer it to a wire rack.
This step is important. Gluten-free bread continues setting as it cools, so slicing it while it is extremely hot can result in a gummy or compressed interior.
For clean slices, let the loaf cool completely before cutting.
Use a sharp serrated bread knife and gently saw through the loaf rather than pressing straight down.
Tips for Extra-Soft Gluten-Free Bread
For the fluffiest texture, always measure gluten-free flour carefully. Scooping flour directly from the bag can result in too much flour and a dry loaf. If possible, use a kitchen scale.
Room-temperature eggs also blend more easily with the other ingredients.
Do not reduce the liquid dramatically. Gluten-free flour absorbs moisture differently from wheat flour, and sufficient liquid is essential for a soft crumb.
Another important tip is to avoid adding extra flour simply because the dough is sticky. Gluten-free bread dough is naturally sticky.
If your kitchen is cold, allow additional rising time rather than increasing the yeast dramatically.
Serving Suggestions
This bread is delicious while fresh, especially with butter, jam, honey, or nut butter.
For breakfast, toast slices and top them with scrambled eggs, avocado, cheese, or your favorite spread.
It also makes an excellent sandwich bread. Try turkey and cheese, chicken salad, tuna, grilled vegetables, or a classic peanut butter and banana combination.
For a sweet variation, omit the garlic powder and add a little cinnamon and an extra spoonful of honey.
For a savory version, add dried herbs such as rosemary, oregano, or Italian seasoning.
Storage
Once completely cool, store the bread tightly wrapped at room temperature for up to two days.
For longer storage, slice the loaf and freeze the slices in an airtight freezer bag. Individual slices can be removed as needed and toasted directly from frozen.
Freezing is especially useful for gluten-free bread because it helps preserve its soft texture and prevents unnecessary waste.