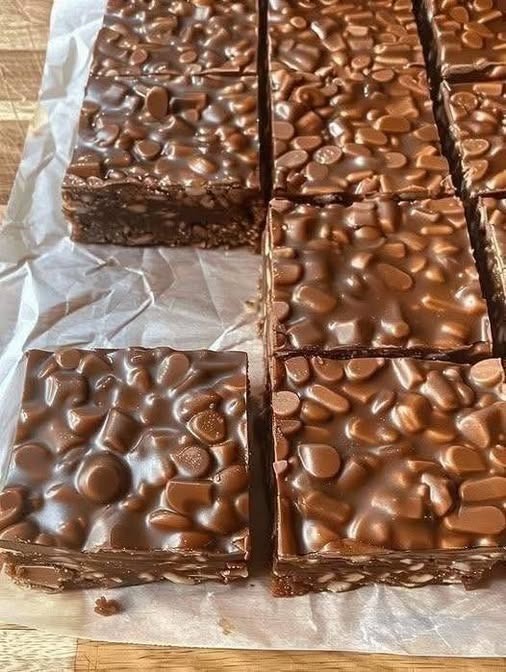
These Easy Homemade Chocolate Peanut Bars are a delicious no-fuss treat made with creamy peanut butter, crunchy peanuts, and rich chocolate. They are perfect when you want something sweet without spending hours in the kitchen. The combination of salty peanuts, smooth peanut butter, and chocolate creates a satisfying homemade candy bar that works wonderfully for snacks, lunchboxes, parties, holidays, or an after-dinner dessert.
The best part is that these bars require simple ingredients and can be prepared ahead of time. Once chilled, they slice beautifully into neat squares or rectangles. You can also customize them with your favorite toppings, making this recipe an easy base for countless variations.
Why You’ll Love These Chocolate Peanut Bars
There is something especially comforting about the classic combination of chocolate and peanut butter. These homemade bars have a rich flavor and satisfying texture while being much simpler than traditional candy-making recipes.
They are:
- Easy to prepare
- Made with everyday ingredients
- Rich and chocolatey
- Creamy and crunchy
- Great for make-ahead desserts
- Easy to customize
- Perfect for sharing
You don’t need complicated equipment or special baking skills. In fact, these bars are largely assembled rather than baked, which makes them especially convenient on warm days or busy afternoons.
Ingredients
For the peanut butter layer, you will need:
- 1 ½ cups creamy peanut butter
- ½ cup unsalted butter, melted
- 1 ½ cups powdered sugar
- 1 teaspoon vanilla extract
- 2 cups crushed graham crackers or finely crushed plain biscuits
- ½ cup chopped roasted peanuts
For the chocolate topping:
- 2 cups semi-sweet or milk chocolate chips
- 2 tablespoons creamy peanut butter
- 1 teaspoon vegetable oil or coconut oil, optional
You can use smooth or crunchy peanut butter depending on the texture you prefer. If using very natural peanut butter, stir it thoroughly before measuring so the oil is evenly incorporated.
How to Make Easy Homemade Chocolate Peanut Bars
1. Prepare the Pan
Line an 8-by-8-inch or 9-by-9-inch square baking pan with parchment paper, leaving some extra paper hanging over the sides. This makes it much easier to lift the chilled bars from the pan later.
Lightly grease the parchment if desired.
2. Make the Peanut Butter Mixture
Add the melted butter and peanut butter to a large mixing bowl. Stir until smooth and well combined.
Add the powdered sugar, vanilla extract, and crushed graham crackers or biscuits. Mix thoroughly until everything comes together into a thick, soft mixture.
Fold in the chopped peanuts. The peanuts add a wonderful crunch that contrasts with the creamy peanut butter base.
If the mixture seems too dry, add a small spoonful of peanut butter. If it seems unusually soft, add a little more crushed biscuit crumbs.
3. Press Into the Pan
Transfer the peanut butter mixture to the prepared pan. Use the back of a spoon, spatula, or the bottom of a measuring cup to press it firmly into an even layer.
Take your time during this step. A firmly packed base will make the finished bars easier to cut and less likely to crumble.
Place the pan in the refrigerator while you prepare the chocolate topping.
4. Melt the Chocolate
Place the chocolate chips and 2 tablespoons of peanut butter in a microwave-safe bowl.
Heat in short 20- to 30-second intervals, stirring well between each interval. Continue until the chocolate is almost completely melted, then stir until smooth.
If you prefer to use a double boiler, place the bowl over gently simmering water and stir until melted and glossy.
For a smoother chocolate layer, you can add a teaspoon of vegetable or coconut oil. This is optional but can make the topping easier to spread and slice.
5. Add the Chocolate Layer
Remove the chilled peanut butter base from the refrigerator. Pour the melted chocolate over the top and spread it evenly with a spatula.
If desired, sprinkle a few additional chopped peanuts over the chocolate while it is still soft. A light sprinkle of flaky sea salt can also provide a delicious sweet-and-salty contrast.
6. Chill Until Firm
Return the pan to the refrigerator and chill for at least 1 to 2 hours, or until the chocolate is completely set and the peanut butter layer feels firm.
For especially clean cuts, you can chill the bars longer or briefly place them in the freezer before slicing.
How to Cut the Bars
Once completely chilled, lift the entire slab from the pan using the parchment paper.
Place it on a cutting board and use a sharp knife to cut it into squares or rectangular bars. For cleaner cuts, warm the knife under hot water, dry it thoroughly, and then slice.
If the chocolate cracks while cutting, allow the bars to sit at room temperature for several minutes before trying again.
Easy Variations
This recipe is wonderfully flexible.
For extra crunch, replace some of the creamy peanut butter with crunchy peanut butter or add additional roasted peanuts.
For a richer chocolate flavor, use dark chocolate chips instead of milk chocolate.
You can also mix mini chocolate chips into the peanut butter layer or add shredded coconut for a slightly tropical variation.
For holiday treats, decorate the chocolate topping with colorful sprinkles before it sets. You can also drizzle melted white chocolate over the finished bars for an attractive bakery-style appearance.
Storage
Store the finished chocolate peanut bars in an airtight container in the refrigerator. They will generally keep well for about a week when properly refrigerated.
You can also freeze the bars. Place parchment paper between layers to prevent sticking, then store them in a freezer-safe container for up to a couple of months. Thaw them in the refrigerator before serving.
Serving Suggestions
These bars are delicious straight from the refrigerator, but allowing them to sit at room temperature for a few minutes gives the peanut butter layer a softer, creamier texture.
Serve them with coffee, tea, milk, or a scoop of vanilla ice cream. They also make an excellent homemade addition to dessert platters and gift boxes.