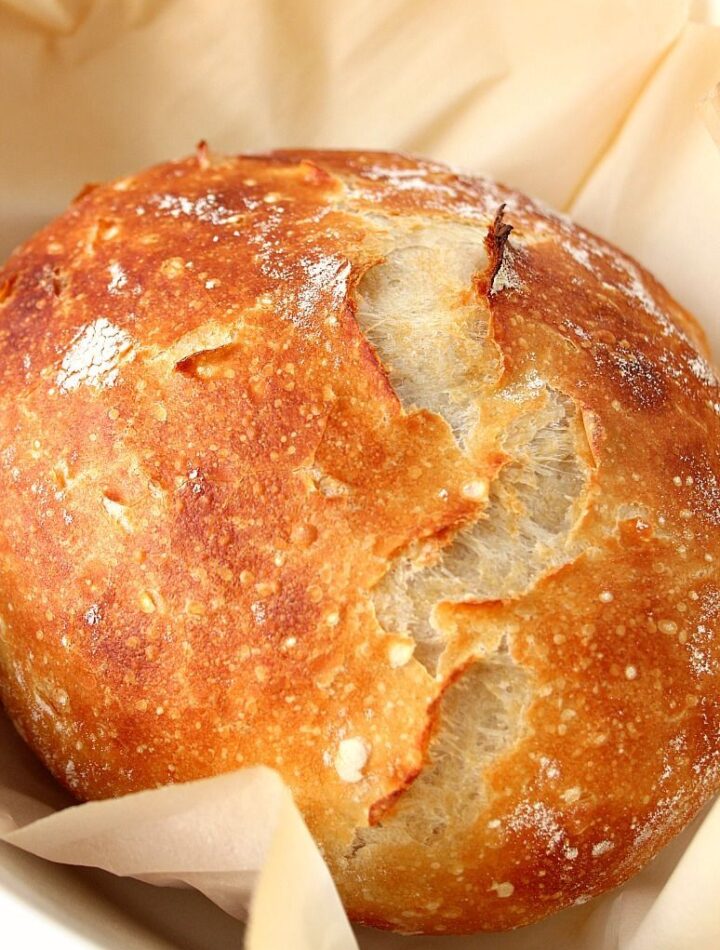
No-knead sourdough bread is one of the easiest ways to make a beautiful artisan-style loaf at home. It requires very little hands-on work, yet the long fermentation develops a deliciously tangy flavor, chewy texture, and crisp, golden crust. The secret is simply time: instead of kneading the dough, you allow fermentation and gentle folds to develop the gluten naturally.
This recipe is perfect for beginners because you do not need a stand mixer or complicated equipment. With an active sourdough starter, flour, water, salt, and patience, you can make bakery-quality bread in your own kitchen.
Ingredients
- 100 grams active sourdough starter
- 350 grams lukewarm water
- 500 grams bread flour
- 10 grams fine sea salt
- Rice flour or extra flour, for dusting
- A little olive oil, optional, for handling the dough
Equipment
- Large mixing bowl
- Wooden spoon or dough scraper
- Kitchen scale
- Clean kitchen towel
- Dutch oven with lid
- Parchment paper
- Sharp bread lame or razor blade
- Cooling rack
Step 1: Prepare the Starter
For the best results, use a sourdough starter that is active, bubbly, and recently fed. Ideally, the starter should be near its peak activity when you begin mixing the dough.
If your starter has been refrigerated, feed it several hours beforehand and wait until it becomes visibly bubbly and increases significantly in volume. A strong starter helps the dough rise naturally and gives the finished bread a pleasant sourdough flavor.
Step 2: Mix the Dough
Add the active sourdough starter and lukewarm water to a large bowl. Stir until the starter is mostly dissolved.
Add the bread flour and mix with a wooden spoon or your hands until no large patches of dry flour remain. The dough will look rough, sticky, and shaggy. That is completely normal.
Cover the bowl with a clean towel and let the dough rest for about 30 minutes. This resting period, sometimes called autolyse, allows the flour to absorb the water and begins developing the gluten.
Step 3: Add the Salt
After the initial rest, sprinkle the salt over the dough. Wet your hands slightly and gently pinch, fold, and squeeze the dough until the salt is evenly incorporated.
The dough may feel sticky at first, but avoid adding large amounts of extra flour. A wetter dough generally produces a lighter crumb and beautiful holes in the finished loaf.
Step 4: Stretch and Fold
Instead of kneading, this recipe uses a few gentle stretch-and-folds.
With damp hands, grab one side of the dough, gently stretch it upward, and fold it toward the center. Turn the bowl and repeat with another side. Continue until you have folded all four sides.
Cover the bowl and let it rest for about 30 minutes. Repeat the stretch-and-fold process three more times, allowing approximately 30 minutes between each round.
As the folds continue, you should notice the dough becoming smoother, stronger, and more elastic.
Step 5: Bulk Fermentation
After the final fold, cover the bowl and leave the dough at room temperature for bulk fermentation.
This stage can take approximately 4 to 8 hours depending on the temperature of your kitchen and the strength of your starter. Do not rely only on the clock. Look for signs that the dough is ready.
The dough should become noticeably larger, smoother, and slightly puffy. You may see bubbles along the sides or underneath the surface. It does not necessarily need to double in size.
Warm kitchens generally require less fermentation time, while cooler rooms may require considerably longer.
Step 6: Shape the Loaf
Lightly flour your work surface and gently transfer the dough onto it. Try not to press out all the air bubbles.
Shape the dough into a loose round by folding the edges toward the center. Turn it over so the seam is underneath, then gently pull the dough toward you across the counter to create surface tension.
Place the shaped dough seam-side up into a well-floured proofing basket or a bowl lined with a heavily floured kitchen towel.
Step 7: Cold Proof
Cover the dough and place it in the refrigerator for approximately 8 to 16 hours.
Cold fermentation is one of the easiest ways to improve sourdough bread. It slows fermentation while allowing the dough to develop deeper flavor and structure.
You can bake the loaf directly from the refrigerator, which also makes scoring easier because the cold dough is firmer.
Step 8: Preheat the Dutch Oven
Place your Dutch oven and lid inside the oven. Preheat the oven to 475°F (245°C) for approximately 30 to 45 minutes.
A thoroughly heated Dutch oven creates a hot, enclosed environment that helps the loaf rise dramatically during the first part of baking.
Step 9: Score and Bake
Carefully remove the hot Dutch oven from the oven. Place a piece of parchment paper on your work surface and gently turn the chilled dough onto it.
Use a sharp razor or bread lame to make one deep slash across the top of the loaf. You can also create decorative patterns if desired.
Carefully lower the dough into the hot Dutch oven. Cover with the lid and bake at 475°F (245°C) for 20 minutes.
Then remove the lid, reduce the temperature to 450°F (230°C), and continue baking for another 20 to 25 minutes, or until the crust is deeply golden brown.
For an especially crisp crust, leave the loaf in the oven for a few additional minutes with the oven door slightly open after turning off the heat.
Step 10: Cool Completely
Remove the bread from the Dutch oven and place it on a wire rack. Allow it to cool for at least 1 hour before slicing.
Although it can be tempting to cut into a warm loaf immediately, cooling allows the interior crumb to finish setting. Cutting too early can make the bread gummy.
Once completely cooled, slice with a serrated bread knife and enjoy.
Helpful Tips
Use an active starter: A weak or inactive starter may result in a dense loaf. Look for a starter that is bubbly and lively.
Avoid adding too much flour: Sticky dough is normal. Excess flour can make the bread heavy and dry.
Watch the dough, not just the clock: Fermentation times vary depending on starter strength and room temperature.
Keep the dough covered: Covering prevents the surface from drying out during fermentation.
Preheat the Dutch oven: A properly heated pot is essential for good oven spring and a crisp crust.
Be patient: Sourdough is naturally slow. Giving the dough enough time is one of the most important parts of the process.
Storage
Store the cooled loaf at room temperature in a bread bag, paper bag, or loosely wrapped kitchen towel for up to several days. Avoid storing crusty sourdough in the refrigerator because refrigeration can make the bread stale more quickly.
For longer storage, slice the loaf and freeze the slices in an airtight freezer-safe bag. Individual slices can be toasted directly from frozen.
Serving Ideas
No-knead sourdough is delicious with butter, jam, honey, or nut butter. It also makes excellent toast, sandwiches, bruschetta, grilled cheese, and avocado toast.
For a simple breakfast, toast a thick slice and top it with mashed avocado, a sprinkle of salt, and a poached or fried egg. For something sweet, serve warm sourdough with butter and honey.
This simple no-knead method produces a flavorful, rustic loaf with a crisp crust and soft, chewy interior—without the hard work of traditional kneading.