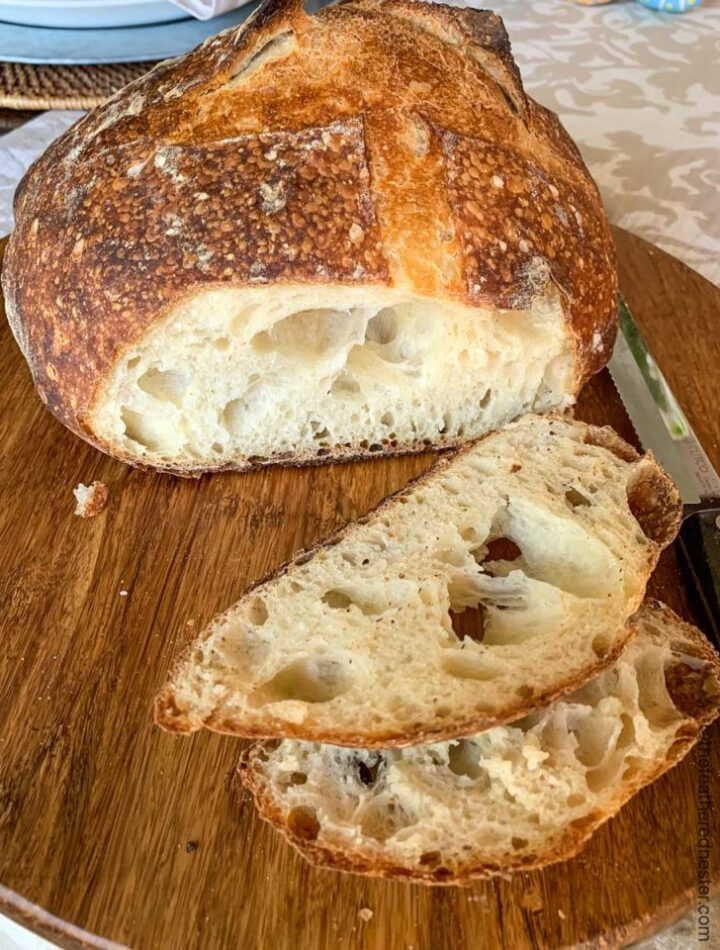
There is something truly special about a loaf of homemade artisan sourdough bread. With its crisp, golden crust, chewy texture, and tangy flavor developed through natural fermentation, sourdough has been a beloved staple for centuries. Unlike commercial breads that rely on instant yeast, sourdough uses a naturally fermented starter, giving the bread its distinctive taste and remarkable depth of flavor.
Making sourdough bread requires patience, but the process is rewarding and surprisingly simple once you understand the basics. This recipe walks you through creating a beautiful artisan loaf with an airy crumb, crackling crust, and authentic bakery-style appearance. Whether you are new to sourdough baking or looking to perfect your technique, this classic recipe is a wonderful place to start.
Why You’ll Love This Recipe
- Crispy artisan-style crust
- Soft, chewy interior with an open crumb
- Naturally fermented flavor
- Simple ingredients
- No commercial yeast required
- Excellent for sandwiches, toast, and serving alongside meals
- Long-lasting freshness
Ingredients
Makes 1 large artisan loaf
For the Dough
- 500 grams bread flour
- 350 grams water, room temperature
- 100 grams active sourdough starter
- 10 grams fine sea salt
Equipment
- Large mixing bowl
- Bench scraper
- Kitchen scale
- Proofing basket (banneton) or bowl lined with a towel
- Dutch oven with lid
- Sharp bread lame or razor blade
- Cooling rack
Understanding the Sourdough Starter
Before beginning, ensure your sourdough starter is active and bubbly. Feed it about 4–6 hours before mixing the dough. A healthy starter should double in size and pass the float test, meaning a small spoonful floats when placed in water.
An active starter is essential for achieving a good rise and proper fermentation.
Step 1: Mix the Dough
In a large mixing bowl, combine the water and active sourdough starter. Stir until the starter is mostly dissolved.
Add the bread flour and mix until no dry flour remains. The dough will appear shaggy and rough.
Cover the bowl with a clean towel and allow the dough to rest for 30 minutes. This resting period, known as autolyse, helps the flour absorb water and improves gluten development.
Step 2: Add Salt
After the autolyse period, sprinkle the salt over the dough.
Use damp hands to squeeze and fold the dough until the salt is fully incorporated. The dough may feel sticky at first but will become smoother as you work it.
Cover the bowl and let it rest for 30 minutes.
Step 3: Stretch and Fold
To build strength in the dough, perform a series of stretch-and-fold sessions.
With damp hands, grab one side of the dough, stretch it upward, and fold it over itself. Rotate the bowl and repeat on all four sides.
Cover and rest for 30 minutes.
Repeat this process 3–4 times over the next 2 hours.
With each round, the dough will become smoother, stronger, and more elastic.
Step 4: Bulk Fermentation
After the final stretch-and-fold session, cover the dough and allow it to ferment at room temperature for 4–6 hours.
The exact time depends on room temperature and starter activity.
The dough is ready when:
- It has increased in volume by about 50%
- Small bubbles appear throughout
- The surface looks puffy and slightly domed
Avoid over-fermenting, as this can weaken the dough structure.
Step 5: Shape the Dough
Lightly flour your work surface.
Gently turn the dough out onto the counter, being careful not to deflate it completely.
Using a bench scraper, shape the dough into a round by pulling the edges toward the center and creating tension on the surface.
Allow the dough to rest uncovered for 20 minutes.
Perform a final shaping by tightening the dough into a smooth round loaf.
Step 6: Final Proof
Dust a proofing basket or towel-lined bowl generously with flour.
Place the shaped dough seam-side up into the basket.
Cover and refrigerate for 8–16 hours.
This cold proof develops flavor and makes the dough easier to score before baking.
Step 7: Preheat the Oven
The next day, place your Dutch oven with its lid into the oven.
Preheat the oven to 475°F (245°C) for at least 45 minutes.
A thoroughly heated Dutch oven helps create steam and promotes excellent oven spring.
Step 8: Score the Dough
Remove the dough from the refrigerator.
Carefully invert it onto a piece of parchment paper.
Using a sharp lame or razor blade, make one long slash across the top about ½ inch deep.
Scoring allows controlled expansion during baking and creates the characteristic artisan appearance.
Step 9: Bake the Bread
Carefully remove the hot Dutch oven from the oven.
Using the parchment paper, lower the dough into the Dutch oven.
Cover immediately with the lid.
Bake for 20 minutes with the lid on.
The trapped steam helps create maximum rise and a glossy crust.
After 20 minutes, remove the lid and continue baking for 20–25 minutes.
The bread should become deep golden brown with a crisp crust.
The internal temperature should reach approximately 205–210°F (96–99°C).
Step 10: Cool Completely
Transfer the bread to a cooling rack.
Allow it to cool for at least 1 hour before slicing.
While it may be tempting to cut into it immediately, cooling allows the crumb to finish setting and prevents a gummy texture.
Serving Suggestions
This artisan sourdough bread pairs beautifully with:
- Butter and jam
- Soups and stews
- Cheese boards
- Olive oil and balsamic vinegar
- Sandwiches
- Avocado toast
- Grilled vegetables
Its robust flavor complements both savory and sweet toppings.
Storage Tips
Store the bread at room temperature in a paper bag or bread box for up to 4 days.
Avoid storing it in the refrigerator, which can cause it to stale more quickly.
For longer storage, slice and freeze the loaf for up to 3 months.
Tips for Success
- Always use an active, healthy starter.
- Measure ingredients by weight for accuracy.
- Avoid adding excess flour during shaping.
- Use a Dutch oven for the best crust development.
- Allow adequate fermentation time.
- Cool completely before slicing.