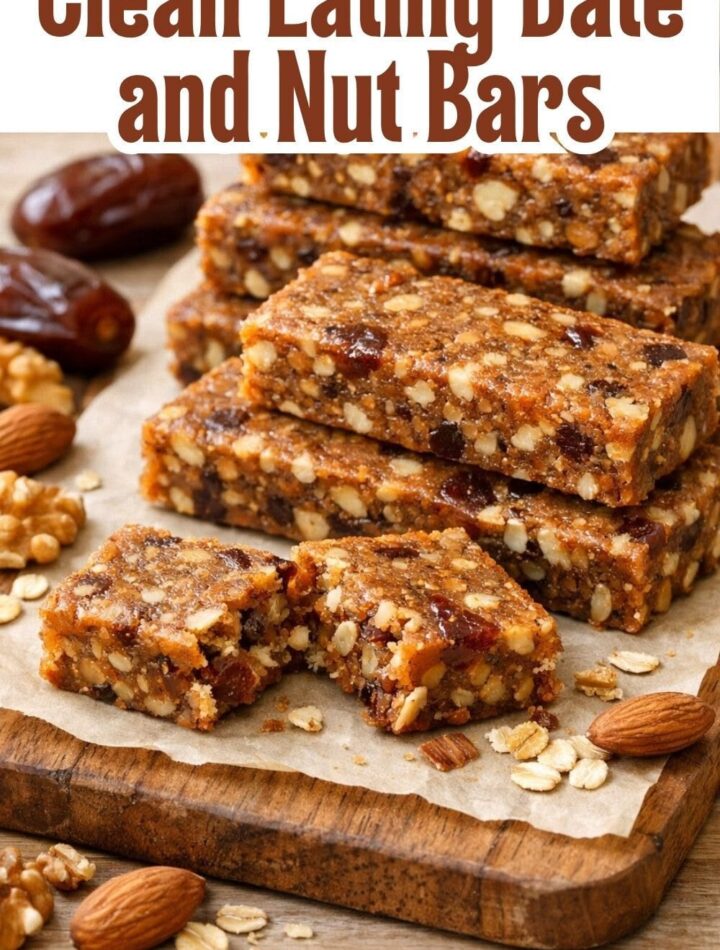
If you’re looking for a wholesome snack that tastes naturally sweet without relying on refined sugar, these Clean Eating Date and Nut Bars are an excellent choice. They’re chewy, satisfying, nutty, and incredibly simple to prepare. Best of all, there’s no oven required. Everything comes together in a food processor, then the mixture is pressed into a pan and chilled until firm.
Dates provide natural sweetness and stickiness, making them perfect for creating homemade snack bars. Mixed nuts add a pleasant crunch and richness, while optional seeds and nut butter can give the bars even more texture and flavor. A little vanilla and salt help balance everything and bring out the natural flavors.
These bars are especially useful for busy mornings, lunchboxes, afternoon snacks, or a quick bite before heading out. Make a batch ahead of time and keep them refrigerated so you always have something convenient on hand.
Why You’ll Love These Date and Nut Bars
There are plenty of reasons to add these easy snack bars to your recipe collection.
No baking required: There’s no need to heat up the kitchen. Simply process, press, chill, and slice.
Naturally sweet: Soft dates provide the main sweetness, so there’s no need for refined sugar.
Simple ingredients: The recipe uses a short list of familiar ingredients that are easy to customize.
Great for meal prep: Make the bars ahead and store them in the refrigerator for quick snacks throughout the week.
Easy to customize: You can change the nuts, add seeds, mix in coconut, or introduce warm spices to create your favorite combination.
Ingredients
1½ cups pitted Medjool dates
Medjool dates are soft, naturally sweet, and sticky. Their texture helps bind the ingredients together. If your dates are unusually dry or firm, soaking them briefly in warm water can make them easier to process.
1 cup mixed nuts
Use your favorite combination of almonds, walnuts, cashews, or pecans. You can use one type of nut or combine several for a more interesting texture.
2 tablespoons nut butter
Nut butter is optional, but it makes the bars richer and can help bring the mixture together if it seems a little dry. Almond butter, peanut butter, or cashew butter all work well.
1 tablespoon chia seeds or pumpkin seeds
Seeds are optional but add extra texture. Chia seeds are especially useful for adding a tiny bit of crunch, while pumpkin seeds provide a more noticeable bite.
1 teaspoon vanilla extract
Vanilla gives the bars a subtle dessert-like flavor and complements both the dates and nuts.
Pinch of salt
A small amount of salt balances the sweetness of the dates and enhances the nutty flavors.
How to Make Clean Eating Date and Nut Bars
Step 1: Prepare the dates
Start by checking your dates carefully and removing any pits if necessary. If they feel dry or firm, place them in warm water for about 5 to 10 minutes. Drain them thoroughly afterward.
It’s important not to leave excess water on the dates because too much moisture can make the finished bars overly soft.
Step 2: Process the nuts
Place the mixed nuts into a food processor. Pulse several times until they are finely chopped.
Avoid processing the nuts continuously for too long. You want small pieces throughout the mixture rather than turning the nuts into a smooth nut flour or butter. Those little pieces provide the delicious crunch that makes these bars so enjoyable.
Step 3: Add the remaining ingredients
Add the softened dates, optional nut butter, chia or pumpkin seeds, vanilla extract, and salt.
Pulse or process until the mixture becomes sticky and begins clumping together. When you squeeze a small amount between your fingers, it should hold its shape.
If the mixture remains crumbly, add a little more nut butter and process again. Because dates vary in moisture, the exact texture can differ slightly from batch to batch.
Step 4: Prepare the pan
Line an 8-by-8-inch square pan with parchment paper. Leave a little parchment hanging over the sides so you can easily lift the chilled mixture from the pan later.
Transfer the date-and-nut mixture into the pan.
Step 5: Press firmly
Use the back of a spoon, a spatula, or your clean hands to press the mixture firmly and evenly into the pan.
This step is important. Pressing firmly helps compact the ingredients and prevents the bars from falling apart when sliced.
Pay special attention to the corners and edges.
Step 6: Chill
Place the pan in the refrigerator for at least 1 hour, or until the mixture is firm.
Chilling allows the dates and nut butter to firm up and makes the bars much easier to cut neatly.
Step 7: Slice and serve
Once firm, lift the entire mixture from the pan using the parchment paper. Place it on a cutting board and cut into bars or squares.
For eight generous bars, cut the mixture into eight portions. You can also make smaller squares if you prefer bite-sized snacks.
Helpful Tips for Perfect Bars
Use soft dates. Soft, fresh dates are easier to process and provide better binding. If your dates are dry, soaking them briefly in warm water can make a big difference.
Don’t over-process the nuts. A little texture makes these bars much more enjoyable. Stop processing once the nuts are finely chopped.
Press firmly. Loose mixtures are more likely to crumble. Compact the mixture thoroughly in the pan.
Adjust the consistency. If the mixture seems too dry, add a small spoonful of nut butter. If it seems extremely sticky, chilling it longer can help.
Chill before cutting. Trying to slice the bars immediately can result in messy pieces. Give them enough time to firm up.
Delicious Variations
One of the best things about these bars is how easy they are to customize.
Chocolate Date and Nut Bars
Add 1 to 2 tablespoons of unsweetened cocoa powder for a chocolate version. You can also mix in a small amount of chopped dark chocolate.
Coconut Date Bars
Add unsweetened shredded coconut to the mixture. Coconut pairs beautifully with dates and nuts and gives the bars a pleasant chewy texture.
Cinnamon Spice Bars
Add a pinch of cinnamon, or combine cinnamon with a tiny amount of nutmeg for a warm, comforting flavor.
Protein Date Bars
For a more substantial snack, add a spoonful of your preferred protein powder. If the mixture becomes too dry, add a little extra nut butter to restore the proper consistency.
Extra Crunch Bars
Increase the amount of pumpkin seeds or add chopped sunflower seeds for additional texture.
How to Store Them
Store the finished bars in an airtight container in the refrigerator. Separating layers with parchment paper can prevent them from sticking together.
They can be kept refrigerated for about one week. For longer storage, wrap individual bars and place them in the freezer for up to two months.
When you’re ready to enjoy a frozen bar, allow it to thaw in the refrigerator or at room temperature until it reaches your preferred texture.
What to Serve With Them
These date and nut bars are delicious on their own, but they can also become part of a more complete snack.
Serve one with fresh fruit and plain yogurt for a simple snack plate. They also pair nicely with coffee or tea in the morning. For breakfast, enjoy a bar alongside a smoothie or another favorite nourishing food.
Frequently Asked Questions
Can I make these without a food processor?
Yes. A food processor makes the process much easier, but you can finely chop the nuts and dates by hand. The dates should be chopped very finely so they can bind the ingredients together.
Why are my bars falling apart?
The mixture may need more moisture or stronger compression. Try adding a small spoonful of nut butter and processing again. When pressing the mixture into the pan, make sure you compact it firmly and evenly.
Can I use different nuts?
Absolutely. Almonds, walnuts, cashews, and pecans are all good choices. You can use whatever combination you enjoy.
Can I leave out the seeds?
Yes. The seeds are optional, so the bars will still work without them.
Are these bars baked?
No. They are completely no-bake. The mixture is processed, pressed into a lined pan, and refrigerated until firm.