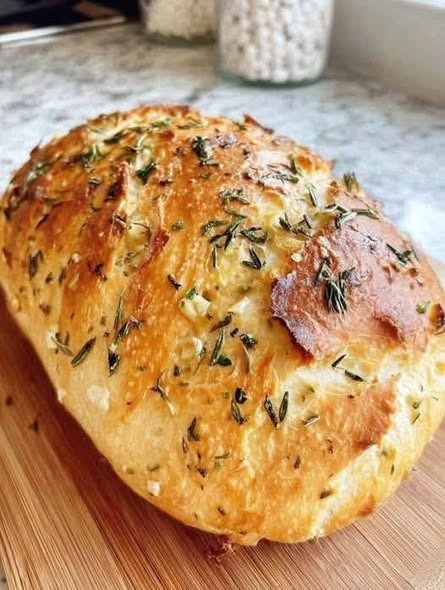
There’s something irresistible about warm, homemade garlic bread fresh from the oven. This No-Knead Garlic Bread recipe combines the ease of a simple no-knead dough with the rich flavors of garlic, butter, and herbs. The result is a loaf that is crispy on the outside, soft and airy on the inside, and bursting with savory garlic flavor in every bite.
Unlike traditional bread recipes that require extensive kneading, this version relies on a long resting time to develop gluten naturally. This makes it perfect for beginner bakers or anyone who wants bakery-quality bread without the extra effort. Serve it alongside pasta, soup, salad, or enjoy it on its own as a delicious snack.
Why You’ll Love This Recipe
- No kneading required
- Crispy crust and soft interior
- Rich garlic and herb flavor
- Beginner-friendly
- Uses simple pantry ingredients
- Perfect side dish for many meals
- Great for sharing with family and friends
Preparation Time
- Prep Time: 15 minutes
- Rise Time: 12–18 hours
- Second Rise: 45 minutes
- Bake Time: 35–40 minutes
- Total Time: Approximately 14–19 hours
Servings
Makes 1 large loaf (8–10 servings)
Ingredients
For the Bread Dough
- 3 cups all-purpose flour
- 1 teaspoon salt
- ½ teaspoon instant yeast
- 1½ cups warm water
For the Garlic Butter
- 4 tablespoons unsalted butter, melted
- 4 cloves garlic, finely minced
- 1 tablespoon fresh parsley, chopped
- 1 teaspoon dried oregano
- ¼ teaspoon black pepper
- ¼ teaspoon salt
Optional Toppings
- Grated Parmesan cheese
- Extra parsley
- Red pepper flakes
- Mozzarella cheese
Equipment Needed
- Large mixing bowl
- Wooden spoon
- Plastic wrap or kitchen towel
- Dutch oven or covered baking dish
- Pastry brush
- Cooling rack
Instructions
Step 1: Prepare the Dough
In a large mixing bowl, combine the flour, salt, and instant yeast.
Stir to distribute the ingredients evenly.
Pour in the warm water.
Using a wooden spoon or spatula, mix until a shaggy dough forms.
The dough will appear sticky and somewhat rough. This is completely normal.
There is no need to knead the dough.
Cover the bowl tightly with plastic wrap or a clean kitchen towel.
Step 2: Let the Dough Rise
Place the covered bowl at room temperature.
Allow the dough to rise for 12 to 18 hours.
During this time, the yeast slowly develops flavor while naturally strengthening the dough structure.
By the end of the rising period, the dough should have doubled in size and be covered with small bubbles.
This slow fermentation creates excellent texture and flavor.
Step 3: Prepare the Garlic Butter
In a small bowl, combine:
- Melted butter
- Minced garlic
- Chopped parsley
- Dried oregano
- Black pepper
- Salt
Mix thoroughly.
Set aside.
The garlic butter will be used both inside and on top of the bread for maximum flavor.
Step 4: Shape the Dough
Lightly flour a clean work surface.
Turn the risen dough out onto the floured surface.
Using floured hands, gently fold the dough over itself several times.
Avoid aggressively handling the dough, as you want to preserve the air bubbles created during fermentation.
Shape the dough into a rough round loaf.
Step 5: Add Garlic Butter Layers
Flatten the dough slightly into a rectangle.
Brush about half of the garlic butter mixture over the surface.
Fold the dough over itself several times to distribute the garlic flavor throughout the loaf.
Shape it back into a round loaf.
This creates pockets of garlic flavor inside the bread.
Step 6: Second Rise
Place the shaped dough on a piece of parchment paper.
Cover loosely with a kitchen towel.
Allow it to rest for 45 minutes.
During this time, the dough will puff slightly and relax before baking.
Step 7: Preheat the Oven
About 30 minutes before baking, place a Dutch oven with its lid inside your oven.
Preheat the oven to 450°F (230°C).
Heating the Dutch oven helps create steam and produces a beautifully crisp crust.
Step 8: Transfer the Dough
Carefully remove the hot Dutch oven from the oven.
Using the parchment paper as a sling, carefully lower the dough into the Dutch oven.
Cover immediately with the lid.
Step 9: Bake the Bread
Bake covered for 30 minutes.
The trapped steam helps the bread rise and develop a crisp crust.
After 30 minutes, remove the lid.
Brush the remaining garlic butter over the top of the loaf.
Return the bread to the oven and bake uncovered for an additional 10 minutes.
The crust should become deeply golden brown and beautifully crisp.
Step 10: Cool the Bread
Remove the bread from the Dutch oven.
Transfer it to a cooling rack.
Allow it to cool for at least 20 minutes before slicing.
Although it may be tempting to cut into it immediately, cooling helps the interior finish setting properly.
Serving Suggestions
No-Knead Garlic Bread pairs wonderfully with many meals.
Pasta Dishes
Serve alongside spaghetti, lasagna, fettuccine Alfredo, or baked ziti.
Soups
Pair with tomato soup, vegetable soup, chicken soup, or creamy chowders.
Salads
Enjoy with Caesar salad, garden salad, or Greek salad.
Appetizer
Slice and serve with olive oil, balsamic vinegar, or dipping sauces.
Flavor Variations
Cheesy Garlic Bread
Sprinkle shredded mozzarella or Parmesan over the loaf during the final baking stage.
Herb Garlic Bread
Add rosemary, thyme, or basil to the garlic butter.
Spicy Garlic Bread
Mix crushed red pepper flakes into the butter.
Roasted Garlic Bread
Replace fresh garlic with roasted garlic for a sweeter, deeper flavor.
Whole Wheat Version
Substitute up to half of the all-purpose flour with whole wheat flour.
Tips for Success
Allow Enough Rise Time
The long fermentation period is essential for flavor and texture.
Use Fresh Garlic
Fresh garlic provides the strongest and most authentic flavor.
Don’t Overwork the Dough
Gentle handling preserves the air pockets.
Preheat the Dutch Oven
This step helps create a professional-quality crust.
Let the Bread Cool
Cooling improves texture and makes slicing easier.
Storage Instructions
Room Temperature
Store in an airtight container or bread bag for up to 3 days.
Refrigerator
Store for up to 1 week, though the bread may become slightly firmer.
Freezer
Wrap tightly and freeze for up to 3 months.
Thaw at room temperature before serving.
Reheating
Warm slices in a 350°F (175°C) oven for 5–10 minutes.
Conclusion
This No-Knead Garlic Bread is the perfect combination of simplicity and flavor. With its crispy golden crust, airy interior, and rich garlic butter throughout, it delivers bakery-quality results with minimal effort. The no-knead method makes it accessible to bakers of all skill levels, while the garlic and herb flavors make it a standout addition to any meal. Whether served alongside pasta, soup, or enjoyed on its own, this homemade garlic bread is sure to become a favorite recipe you’ll return to again and again. Enjoy every warm, garlicky slice! 🧄🍞✨